
Just imagine you are developing an embedded device or IoT device solution where you need to interact your software with a hardware device over a Com port.
Normally you need to have your real device turn on and connect it to your development PC before you can interact with it. The challenge is that you might develop your software and the embedded prototype is not ready yet, you are waiting for it, you need to test it locally before connecting to a real device or just to emulate the data communication before developing an embedded prototype. Then your only way is to create a virtual Com port.
In this article, I am going to use Virtual Serial Port Driver 9.0 from Eltima’s software.
I will demonstrate how to use Virtual Serial Port Driver 9.0 using two different examples:
- Chat example based on C#, using Microsoft System.IO.Ports example.
- Using C# to emulate an embedded device that sends sensor data using and receiving the data.
Before we dig into examples, let’s download the Virtual Serial Port 9.0 standard edition from https://www.eltima.com/products/vspdxp.
Install the software and start it.
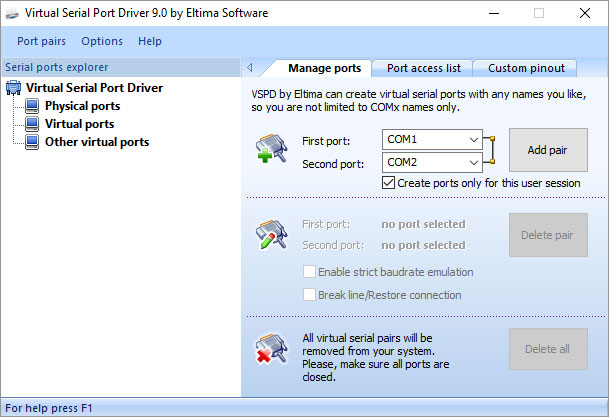
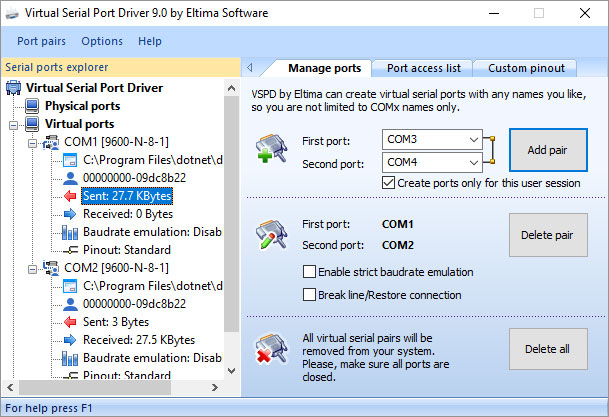
Click on Add Pair
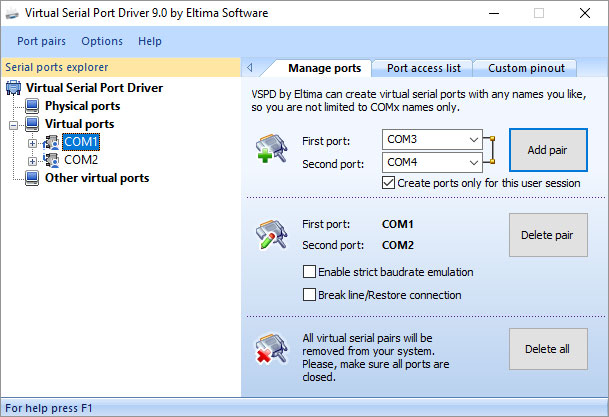
And Ya, That’s it, now you have 2 com virtual ports COM1 and COM2.
I found Virtual Serial Port Driver 9.0 one of the easiest and most stable virtual serial port software on market. It allows me to develop and test my code before spending hours on a real device testing.
Example 1
I have visited Microsoft SerialPort Class (Sytem.IO.Ports) page and found a chat example. I have created a visual studio solution that contains all examples of this article on my git ComPort. Clone it and fire up your Visual Studio with the solution twice (I do use VS2017) and yes, I mean start Visual Studio two times because we need to have 2 chats to connect to each other.
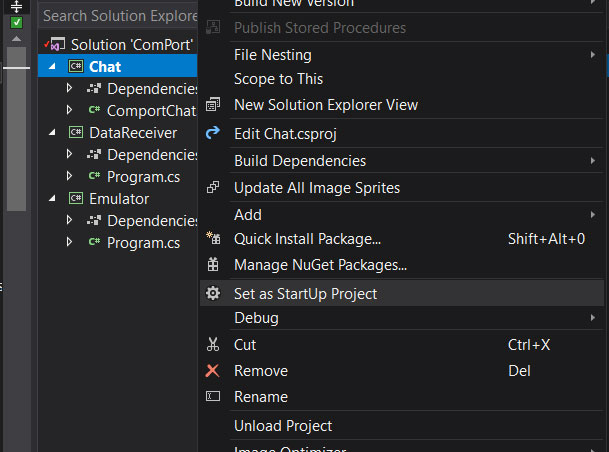
Make sure your Chat project is set as a Start-up project on both VS.
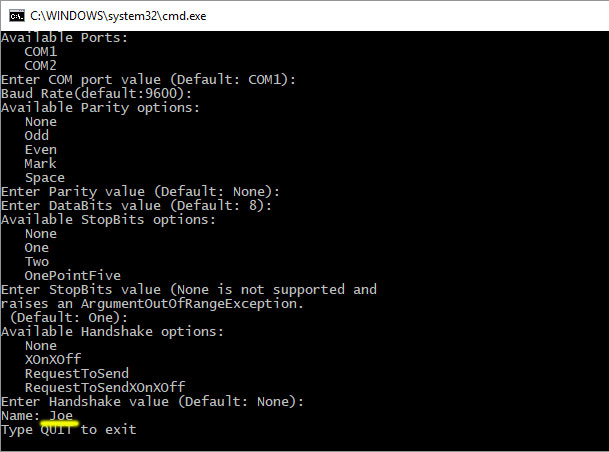
Start the program (ctrl + F5) on your first VS and your console will start asking you questions, just press ENTER (leave empty) until you reach the name, just give any name, I call my first chatter Joe as you can see in the image below.
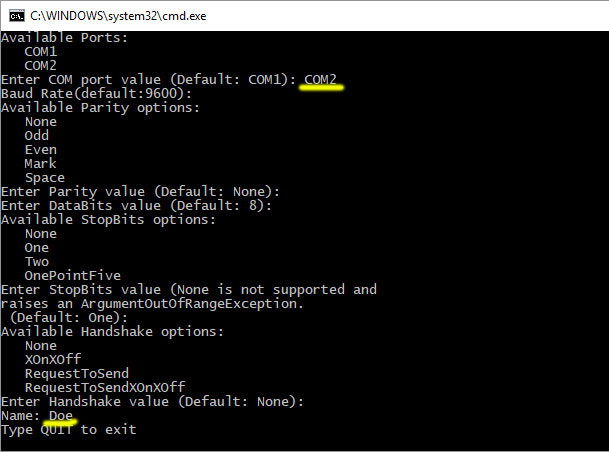
Start your second console program, this time you need to tell the program that you are using COM2 as shown in the image, and tap ENTER until the name and just give it any name, I call my second chatter Doe as you can see in the image below.
Now Joe and Doe can chat between each other.

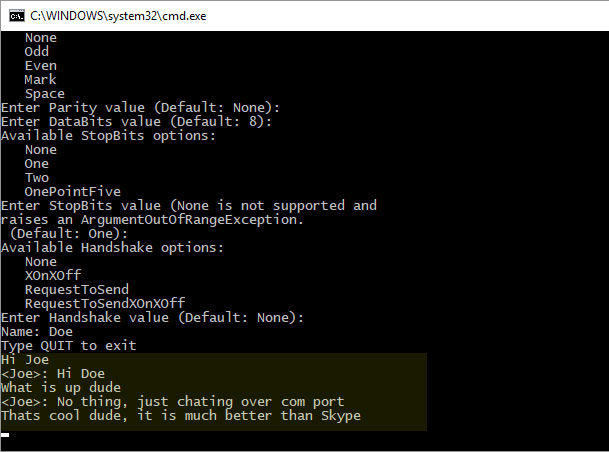
Just imagine if this virtual communication was made with a real device that can receive messages from your system or the other way around, as we went demonstrate in the next example.
Example 2
In this example, I am going to use one port to send some random sensor data, and I will fetch the data on the other port.
This example is based on a real scenario that I have used previously in one of my research and development projects. I was developing a hand gesture solution and my only prototype was not available, So I designed software that emulate the data and send it as if it was the hand gesture, but over my virtual com port.
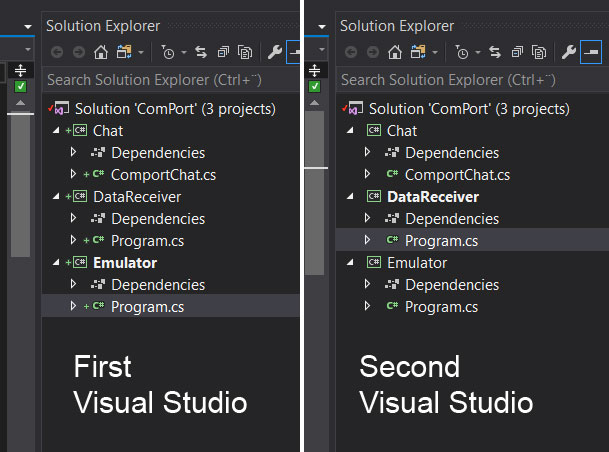
Now instead of having Chat as a start-up project, set your first Visual Studio start-up project to Emulator and the second one to DataReceiver.
Now start up your Emulator program (ctrl + F5) nothing should happen.
On your second Visual Studio start, the DataReceiver program and you should see that the Emulator program is sending x, y, and z data and it is collected by the DataReceiver program.
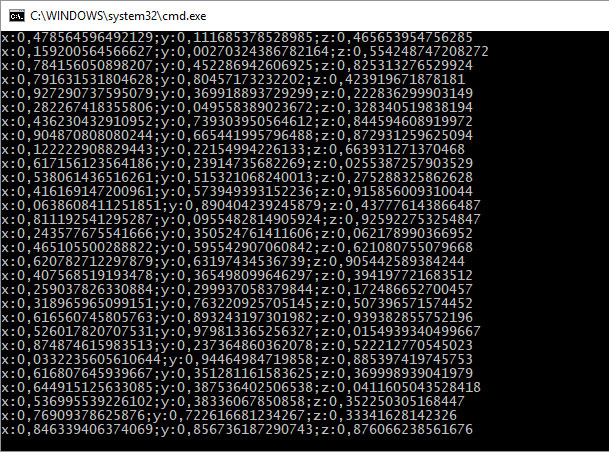
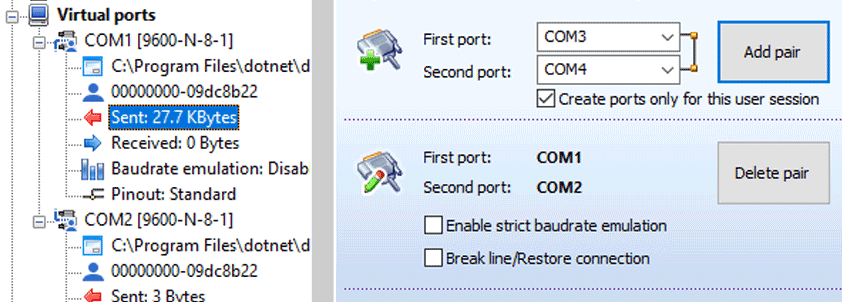
You can also see the amount of data being sent and received by ports.
Now you should be able to parse your received data and make your programming logic without having a real device.
Links:
Thanks, this was useful to kick start my project.