Have you ever built software for a cross-platform and needed to build and test it on different operating systems?
Well, you are prepared to read the right place.
In this article series, I will show 2 ways of using the Multi-Agents strategy with a Multistage pipeline on Azure DevOps using YAML.
Let’s go to it.
The simplest way to build and run a program is by using strategy and matrix. With the strategy and matrix, you can define the type of agent operating system you need to run your program on.
So if I need to test my software on Linux, Windows, and macOS, I do add the following to my job:
strategy:
    matrix:
      Linux:
        imageName: 'ubuntu-latest'
      Mac:
        imageName: 'macOS-latest'
      Windows:
        imageName: 'windows-latest'
Now let’s put it together in a Multistage and see what it looks like:
trigger:
- main

stages:
- stage: Build
  pool:
    vmImage: ubuntu-latest
  jobs:
  - job: BuildJob
    steps:
    - script: echo Building
- stage: TestWithCrossPlatform
  dependsOn: Build
  jobs:
  - job:
    strategy:
      matrix:
        Linux:
          imageName: 'ubuntu-latest'
        Mac:
          imageName: 'macOS-latest'
        Windows:
          imageName: 'windows-latest'
    pool:
      vmImage: $(imageName)
    steps:
    - powershell: |
        "OS = $($env:AGENT_OS)" | Out-Host
      displayName: 'Test with Agent'
- stage: Final
  dependsOn: TestWithCrossPlatform
  pool:
    vmImage: ubuntu-latest
  jobs:
  - job: FinalJob
    steps:
    - script: echo Final Job
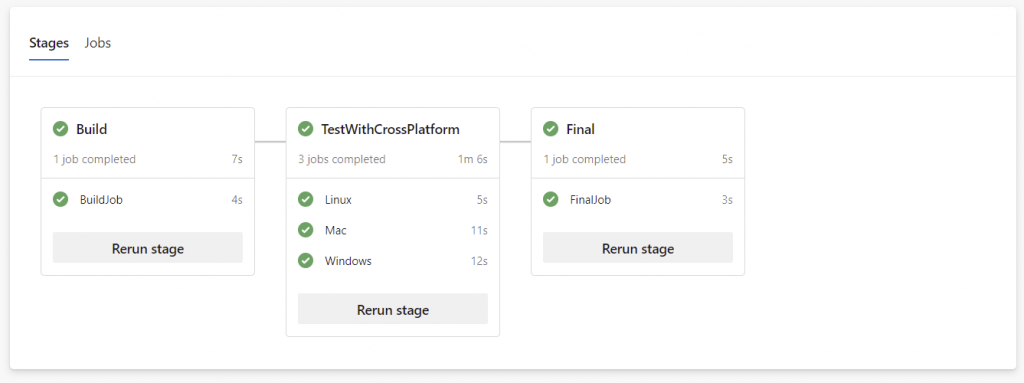
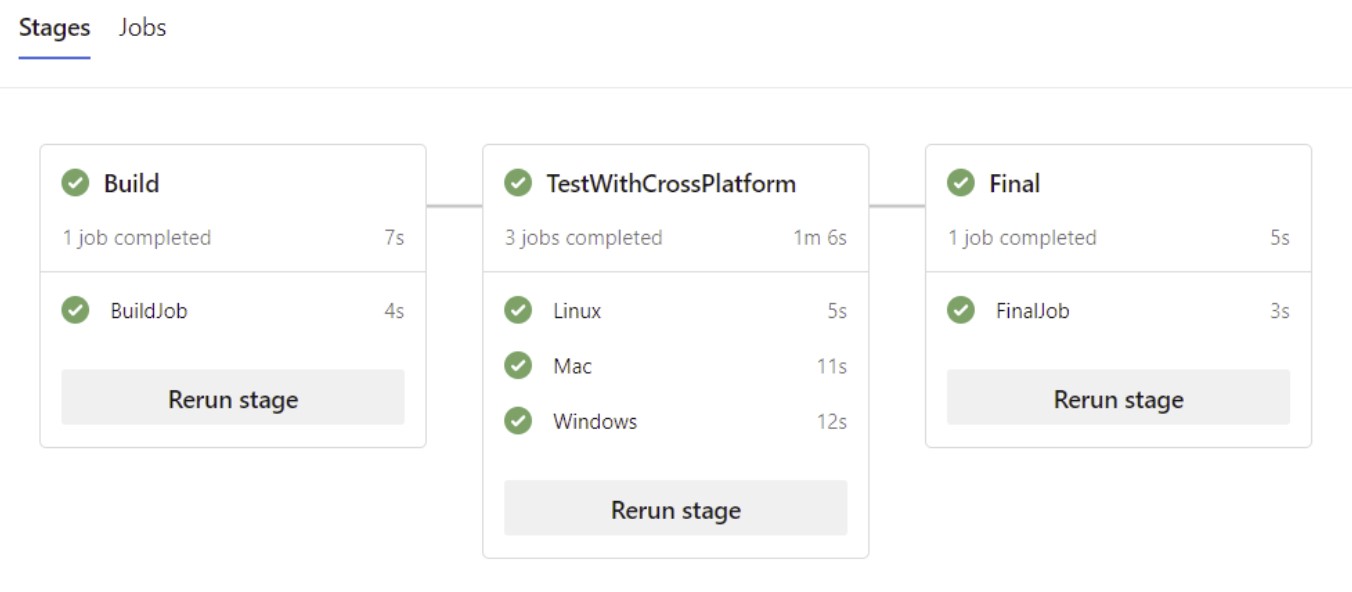
So the visual pipeline will look like this

To see a list of fully supported agents, check this link.
That is it.
Conclusion
We have achieved 2 things in this article:
- Write Multi-stage Pipeline using YAML
- Run the software build and test on Multi-Agent using Strategy and Matrix
As you can Azure DevOps Pipeline is a powerful tool for CI/CD and with a few lines of YAML scripts, we were able to fire up 3 different agents for the same software.
In the next article, I am going to demonstrate separate stages for each agent in the same pipeline.

